Showing posts with label Office 365. Show all posts

Monday, August 27, 2018

Get-CsJosh -Location "Microsoft Ignite" -Type Session (I'm speaking at Ignite!)

Microsoft Ignite 2018 Participation


Right below this paragraph is how to follow me and stay plugged in during Microsoft Ignite. WHY to follow me for Microsoft Ignite follows comes after that ;-)!

How to follow...


Twitter: @GetCsJosh

WHY to follow...


Here we are, less than a month away from Microsoft Ignite 2018, and all passes for Microsoft Ignite have been sold out for about a week now. This is going to be a BIG event! This will be my 3rd Ignite, but my excitement for this one is greater than it has been in years before. Why, you ask? What is the big deal with this year versus yester year[s]? Well read on to find out!

Community Reporter


This year, I have the distinct honor of being chosen to participate as one of the 10 Community Reporters for Microsoft Ignite! If you are not familiar with the Community Reporter role, it was created for Microsoft Ignite last year, with one Community Reporter (a Microsoft MVP or RD) from each major Microsoft product area. The Community Reporter brings the highlights of Ignite from a respective product area back to the relevant social communities by means of short video clips.

The following are some examples of the types of videos you would expect to see from the Community Reporters throughout the duration of Ignite:

  • Interviews of key speakers & Microsoft executives and Program Managers
  • Interviews of attendees on their experiences and thoughts on various components of the conference.
  • "Experience" and "tour" videos of key areas (i.e., the Expo Floor, the Keynote, etc)
  • Daily Recaps
You get the idea! Obviously, I will be reporting largely on the Microsoft UC/IC news (Microsoft Teams, Skype for Business, Office 365). I have some big shoes, to fill, though - the Community Reporter in this space last year was none other than industry legend, fellow MVP, and Microsoft Master, Tom Arbuthnot! Wish me luck (and tune in)!


I'm Speaking at Microsoft Ignite


This year, for the first time, I will actually be speaking at Microsoft Ignite, and could not be more excited for the opportunity! What am I speaking on, you ask? Microsoft Teams, of course! I have a 45-minute session entitled "Building a community-led tech conference using Microsoft Teams", and the Session Code is BRK2285.

Now that you know the session title and the code, you have no excuse not to add it to your schedule now! ;-) Also, if you are not able to make it to Ignite this year, I am told that EVERYTHING will be live-streamed, so be sure to tune it live to watch!

This session will dive into the various ways that myself and the rest of the #CommsvNext team designed and built every aspect of this conference completely from within Microsoft Teams. If all works out, I may even be able to have the rest of the team join me on stage to provide their insights! (fellow MVPs, Jonathan McKinney, Adam Ball, and Pat Richard).

#TeamsRecap - Microsoft Ignite 2018 Edition


It has become somewhat of a tradition at each Microsoft Ignite to have a special #Skype4BRecap / #TeamsRecap episode, co-hosted with fellow MVP, Matt Landis. This year will be no different - except that I may actually have access to record in a more professional setting: and actual production STUDIO! Be sure to keep up with me on Twitter (info above) for the release of this episode.

Matt and I will be going over any key news, and talking about that burning question on every Skype for Business Online customer's mind right now: Is it yet the right time to move to Microsoft Teams?

How to connect while at Microsoft Ignite?


If you are looking to connect with me at Microsoft Ignite, there are a couple key ways (though I can't promise a ton, because as it happens, my schedule is already looking a bit hectic...):

  1. Sessions! Obviously, I will be at BRK2285, speaking, and able to chat a bit afterwards. However, there is a good chance you will run into me at some of the key Microsoft Teams sessions, and a VERY good chance I will be at THE Skype for Business session.
  2. Sponsor Events/Parties. I typically try to make sure I make it to some of the multi-vendor parties (SfB & Teams-related vendors). While some of those details are still being sorted, I am already registered for the CDW Customer Appreciation Event on Wednesday night. If you are CDW customer, and are coming to Ignite, I look forward to seeing you there!
  3. FOLLOW ME ON TWITTER (@GetCsJosh). Seriously, that is one of the best ways to know what I am up to at any given point during a Microsoft Ignite conference. I have a bit of a bad mad-Tweeting habit during these conferences...
See you there!


Wednesday, November 2, 2016

Welcome Microsoft Teams to the Microsoft Collaboration Portfolio!

Today Satya Nadella, Microsoft's CEO, took the stage in New York City, along with Office CVP Kirk Koenigsbauer and other special guests, to make some incredible announcements. Chief among these announcements was the arrival of a new collaboration tool that will compete against the mounting momentum of rival product Slack: Microsoft Teams!


While Microsoft Teams is probably the single biggest announcement in the Skype for Business world since Cloud PBX and PSTN Calling, it is deeply integrated with the whole Office 365 suite, bringing an incredibly powerful collaboration machine to the enterprise that will be tough to ignore.

A Brief Intro to Microsoft Teams


Teams is in Preview starting today, November 2, 2016, and is targeted for General Availability in Q1 of 2017. Jump on that Preview as early as you can.

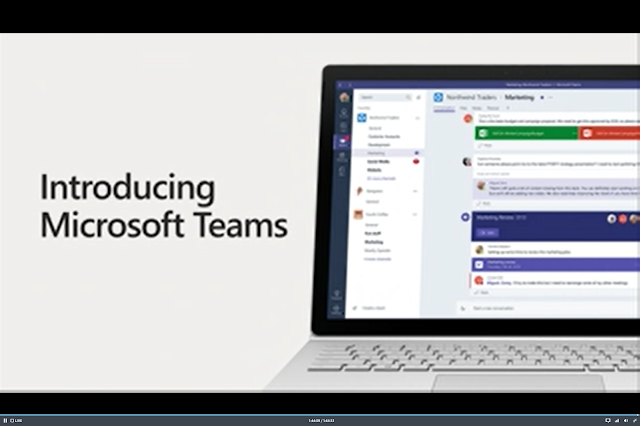
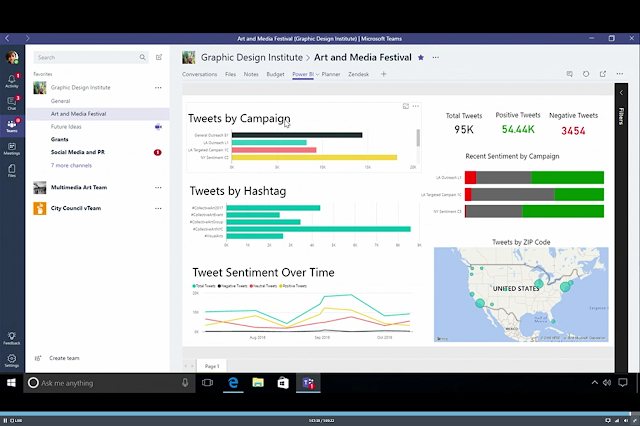
Let's take a look at that slick interface, and built-in Power BI functionality:


And of course, the Skype for Business integration is deep. We have Presence, the ability to strike out into existing Video/Audio chats, or create new ones on the fly:


The Need


This announcement has been rumored and anticipated for several months now, but the rumors have finally been put to rest. So what are the impacts of this announcement for those of us in that live and breath unified communications, primarily Microsoft unified communications?

First, many organizations have largely and quickly adopted Slack as an easy, convenient, and readily-available tool to meet the need for persistent conversations among teams within its walls (and sometimes outside its walls). Many who are not as familiar with this topic may be quick to point to Persistent Chat within Lync Server 2013 and Skype for Business Server 2015 as a suitable solution. At first glance, yes, Persistent Chat would be a great tool for meeting such a need. Unfortunately, Persistent Chat has not been actively developed for quite some time now, and among it's primary limitations is that it ONLY works on Windows clients. That's right, Mac and Linux users can not take advantage of Persistent Chat, and for some organizations, that fact alone makes Persistent Chat a non-viable option for inner-team chat collaboration.

With the need for persistent chat-like communications among teams with clients of various OS types, and Persistent Chat development not budging to meet this need, organizations began looking for alternatives. Slack happened to be the solution that fit the bill best, and was the easiest for teams to quickly adopt.

This presented a great opportunity for Slack in the market; it had an "in" for taking a larger slice of the collaboration pie. It wasn't long before new features started popping up on the Audio and Video side, which of course, meant stronger competition for Microsoft's Skype for Business and other collaboration tools. Clearly, Microsoft needed to address this, and it needed to do so quickly.

The Office 365 Differentiator


This is where "Teams" comes into play. The beauty of Teams is that it will be made available within Office 365. This means that it will slip nicely into current workflows of the droves of organizations that are already taking advantage of Office 365 for their collaboration needs. It is essentially "Persistent Chat" for the Cloud! 


Purchasing an add-on or additional subscription is VERY easy within Office 365, and assigning it to a user is even easier. This means that the time spent deploying the solution will be greatly improved, in comparison to a completely separate tool.

What about the fact that it is not FREE - that it is a paid subscription, and Slack is free? While it is true that there is a free version of Slack, there are also paid versions of Slack with advanced features and capabilities. Many organizations have opted to pay for these advanced features, and if they can achieve the same functionality while utilitizing their current Office 365 platform, it just makes sense.

The race is now on, to learn as much as we can about this amazing new tool, kicking the tires and learning how it will fit into our organizations at GA. I hope you all enjoyed the presentation from Microsoft today, and if you missed it, be looking for more content. It is sure to come pouring out everywhere!

Stay techy my friends!

Tuesday, August 16, 2016

Cloud Connector Edition (CCE) Deployment - Lessons Learned

Hey everyone! Yes, I know, it has been STUPID long since I wrote a blog post, and my excuses are pathetic. Pathetic as they may be, let me list a couple out to try to redeem myself a bit:
  • I changed jobs. Again! - Yep, I my stay at Deloitte ended up being a little shorter than I originally thought it might be, but an opportunity at Integration Partners came my way, and I just couldn't pass it up. While I worked with an amazing team at Deloitte, and was very grateful for that opportunity, this new role has been a pretty awesome ride already, with an awesome team to boot!
  • I've been keeping up with my weekly #Skype4BRecap webcast. -  Yes, I know, webcasting alone is not good enough, but with a weekly schedule, it does actually take up quite a bit of time!
  • My family did a cross-country move. - You have to admit, that is a pretty big task, moving an entire household from NC to TX. And all the packing/prepping was being done while keeping the house in "Showing" condition for potential buyers.
  • And the lamest excuse of all... I was a bit burned out on "written" material after Version 2.0 of my Skype for Business Hybrid Handbook. - I know, cry me a river, but hey, Version 2.0 was a pretty big increase in content, with an entirely new chapter devoted entirely to Cloud Connector Edition! Which leads me to today's topic.

One of the more recent projects I have had the pleasure to dive into has centered around a Cloud Connector Edition (CCE) deployment. The situation was that the company was deploying a greenfield Skype for Business Online environment in Office 365, meaning they did not already have Skype for Business (or Lync Server) on-prem, and wanted to bake in PSTN calling capability for their Skype for Business users. This was all fine and great for their U.S.-based users, who could simply use Cloud PBX with PSTN Calling. However, this company also had a small group of users in a South American country, and with no PSTN Calling functionality outside of the U.S. and U.K. (ok, AND technically Puerto Rico), they would not be able to place PSTN calls via Skype for Business for their South American users.

Enter CCE! The plan was to move all users into Office 365, with all U.S. users using Cloud PBX with PSTN Calling, and all South American users using Cloud PBX with a new on-prem CCE deployment (the CCE would be connecting to a Sonus SBC as the PSTN Gateway, but that doesn't really matter much for this post). So far, all is well! Below is a nifty little network diagram of how CCE was to be deployed (networking info changed to protect the innocent, of course!):


As you can see above, there was only going to be a single PSTN Site created (a single CCE instance); there was no HA to plan for, or other potential complications. A simple deployment was right up my alley, though, as this would be my first production CCE deployment. I was quite excited.

About those "Lessons Learned"?


Alright, I know you are ready for me to quite blabbing and get on with my pointers already, so I want walk you through this step-by-step - we'll save that for another time! Today is simply about a few lessons that I learned when deploying CCE.

1. Plan your networking ahead of time.


This may seem silly to even call out, as it should be obvious, but I found it really helpful, and almost necessary, to have Visio or other diagram that gave you a good visual of how all the networking components were going to be layed out, and more specifically, what IPs would be assigned. Unlike a Skype for Business Server 2015 on-prem deployment, where you can deploy certain pieces in phases, coming back for things when you are ready, CCE requires you to modify a single text file (CloudConnector.ini) with ALL the necessary values for building out your ENTIRE VM environment before deploying your build script.

This means that you needed to prepare your SSL and have it issued and placed on the server prior to running the script, whereas you could simply execute Step 3 in the Skype for Business Deployment Wizard when you were good and ready for on-prem. You needed to provide the public IP for your Access Edge component, as well as the IPs for each of the 4 VMs, and an additional public-facing (but internal) IP for the Edge server, on a separate network than the 4 IPs assigned to the other VMs. You needed to provide the DNS server IP addresses that your VMs would use for public name resolution (I used Google's public DNS servers at 8.8.8.8 for all public name resolution). As you can see, there were plenty of variables to have completely laid out before pressing that Enter button to execute the PowerShell cmdlet for building the environment.

2. No Errors on the build script doesn't mean everything deployed as expected.


After getting all the requirements gathered and documented in your config file, running it smoothly, and seeing that the cmdlet finished without any errors, you may think the execution was flawless. You may be especially tempted to think this when you see those 4 shiny new VMs in the Hyper-V manager, and start accessing them, noticing the presence of all the right software. Sweetness! Or maybe not so much...

Let's say you go to make that call after getting your user configured completely and logged into a client, and bummer of all bummers, the call doesn't go through. First you try an outbound call from the client, and it doesn't even ring; it pretty much just kills the call after a couple seconds. Then you try an inbound call, dialing the assigned LineURI of this new CCE user. Unfortunately, it may start to ring, but never gets through.

In my case, I ended up installing Skype for Business Debugging Tools on the Mediation server VM, and using CLS Logger. With CLS Logger I could not see any attempts at all when placing an outbound call. Looking at the diagram above, we see that the CCE user would first hit Office 365, and then the call would attempt to route through the Edge role and then the Mediation role before moving on to the SBC (my test users was external to the corporate network). Since I saw nothing on the Mediation server via CLS Logger, this meant that the traffic was only getting as far as the Edge role. I then installed Wireshark on the Edge role, and discovered that a Reset was being sent back to Office 365 from the Edge server every time the outbound call was made.

At the same time I noticed that INBOUND calls were getting further, making it to through the Sonus SBC and to the Mediation server, but were not getting any further as the CLS Logger revealed a 503 error, stating that the Invite failed via the proxy, and that it was unable to establish a connection. With both issues, the Edge server appeared to be the common denominator. This confused me, as I would have figured that any problems with the build would have been reported on the PowerShell window during the build. After all, there wasn't any custom config; all config was done by the script, using the values provided in the config file.Well, I thought I would check out the Edge server for the heck of it.

What do you know, there were several Skype for Business services stopped on the Edge, including the Access Edge service! Trying to start these services failed, and further analysis of the Skype for Business event log showed that the reason for the services not starting was missing certificates. How could this be? The CCE cmdlet succeeded in building the environment, and didn't complain about any certificates...I opened up the Skype for Business Deployment Wizard, go to the certificates section, and sure enough, all of the external certificate fields were blank!

Alright, I don't get how that happened at all, but when I highlighted the External section and clicked "Assign", the external certificate was present as an option. This means that the script did in fact install the certificate on the server, but just didn't assign it during the Skype for Business deployment on the Edge. *SIGH*. I assigned it, restarted services, and BOOM. Traffic started to flow through, and calls started ringing. There were still issues to deal with at the carrier level, but the CCE portion was now fixed.

3. Location, Location, Location (for Office 365 License assignment)


Remember how I said that some of the users in this company were in the US, but others were in South America? Well, when this test account was setup, it was configured like most of the other accounts, leaving the default location as US when assigning licenses. No big deal at first, but remember, I was getting ready to test dialing from with this user, making the assumption that the user was located in this South American country. Well, when I try to dial out international, using the expected format for the specific country, the dialing did not work. At all! Never made it to the Edge server. As a matter of fact, the only way I could dial and make it to the Edge was to start out dialing an E.164 formatted number.

I then used the following cmdlet to view the user's properties:

Get-CsOnlineUser -Identity <user>@<sipdomain>

Looking at the output, I could see that the user's DialPlan was set to "US". Clearly this would not work. So, I went back into the Users section of Office 365, into the Properties for the test user, and went to edit the assigned licenses. When prompted for Location, I changed this to the proper country in South America. After saving the settings, I could now see that the user had the DialPlan that reflected their respective country. Perfect! After waiting about 10 minutes for replication, I signed the user back in, and was able to dial as expected, as if the user was in the South American country.

The thing to remember of this point is that many adopters of CCE are going to be global or international firms that want to make a move into Office 365 for most of their services, but are still not able to move many non-U.S. or non-U.K. users into PSTN Calling; they will be interested in moving as much as they can into Office 365, while leaning on CCE to provide PSTN capabilities to the geographically-dispersed portion of their user base via on-prem infrastructure. With this in mind, specifying the correct location when assigning Office 365 licenses will be very important.

In Summary


Well that's about all the lessons I have to share for now from my recent adventures in CCE. However, I feel like there will be more of these in my future, with maybe other factors to consider, so I may just update this post as I come across any more interesting things to watch for as you wade into the fairly new waters of CCE. Hope this has been helpful in some shape or form. If you have run into any of your own interesting "Gotchas" in a CCE deployment, feel free to share your experience in the Comments section!

Stay techy, my friends!


Monday, April 11, 2016

Welcome, Skype for Business Cloud Connector Edition

The road has been a bumpy one, but the project formerly referred to as "Min Topology" is finally out of Preview and available for download in General Availability (GA). Everyone, can we please give a warm welcome to the latest member of the Skype for Business Hybrid family, Skype for Business Cloud Connector Edition!

Before I discuss too much about Cloud Connector Edition (CCE), let me provide a few helpful links. I must point out this post is NOT a deep-dive into CCE; rather it is a discussion about what CCE is, and how your organization can take advantage of it. The below links will provide deep-dive information from Microsoft for all the specific requirements and deployment steps.

 First, before you go racing to download it, check out the TechNet article on how to plan for it: https://technet.microsoft.com/en-us/library/mt605227.aspx.

Once you feel like you have a good handle on planning for CCE, read up a bit on how to configure it: https://technet.microsoft.com/en-us/library/mt605228.aspx. That last one doesn't appear to be quite ready for prime time yet, though, as it says that it is "Coming Soon", and refers to the product as still being in Preview. So, one of these days soon, that link will be a bit more useful...

Alright, finally, the link to download CCE: https://www.microsoft.com/en-us/download/details.aspx?id=51693.

Excellent! Now, if you are still reading this, and haven't raced off to start tinkering with CCE, let's talk a bit about the nature of this product. At the heart of this tool is a very specific deployment: CCE addresses a scenario in which all Skype for Business users in your organization are using Skype for Business Online in Office 365, but you have an on-premises voice infrastructure already in place that provides PSTN connectivity. This means that your organization DOES have the on-premises voice infrastructure, but DOES NOT have any Skype for Business infrastructure deployed on-premises; all Skype for Business users are Office 365-based users. Savvy?

Now, of course your users in Skype for Business Online could simply use PSTN services offered by Microsoft through Office 365, assuming they are licensed for Cloud PBX already, but you will also have to pay for the extra voice licensing (in addition to Cloud PBX licensing). If your organization has already invested in the on-premises voice configuration, and still has a contractual obligation to use this infrastructure, it is likely that the most desired approach would be to leverage this on-premises voice infrastructure to provide PSTN connectivity to your Skype for Business Online users. How, you ask, when there is no on-premises Skype for Business deployment to facilitate the needed hybrid configuration that could provide such functionality? This is where Cloud Connector Edition comes in!

Available as a download from Microsoft, CCE is actually a collection of four virtual machines (VMs) that get deployed on a Hyper-V host server in your organization's DMZ network. These four VMs serve as a mini on-premises Skype for Business deployment, but no users will actually be homed on this instance; it exists solely to facilitate connecting the Skype for Business Online Cloud PBX users with your on-premises voice infrastructure to provide PSTN connectivity to them. The four VMs that get deployed and configured via a guided wizard are:

  1. Domain Controller
  2. Central Management Server (CMS)
  3. Mediation Server
  4. Edge Server
Before you become concerned about the Domain Controller component, let me make it clear that this little virtual environment is completely self-contained, including the Domain Controller (DC). That means this DC is deployed in its own brand new forest, and will not be connected to your corporate Active Directory.

The other pieces are fairly obvious, as they put into the place the bare minimum requirements for a functioning Skype for Business deployment that can facilitate the traversal of the media from your Cloud PBX to your on-premises voice infrastructure (thus the previous term, "Min Topology").

Now, what would this look like in your environment? At a very high-level, we can see the overview of traffic flow through CCE to your on-premises voice infrastructure here:


What would a more detailed media flow look like? The below image shows us that our signaling traffic does have to traverse through Office 365 before coming back through our CCE deployment, and then making its way through the gateway and out into the wild PSTN. It seems like this would be less than optimal for audio, though, doesn't it? Luckily, as we can see in the same diagram below, once the signaling traffic verifies the information for the user, that user's media is able to flow directly to the CCE host (completely skipping the Office 365 infrastructure), and on to the on-premises PSTN gateway. Beautiful!


So, would do you think? Is this a pretty cool solution for providing existing on-premises PSTN connectivity to your Skype for Business Online users without having to have a full-blown, licensed, on-premises Skype for Business Server 2015 deployment? I think so!

Like I said, I am not going to go deep on this post in regards to requirements, planning, and detailed deployment; that is all highlighted quite nicely in the Microsoft links provided above. Instead, I hope this post has been helpful in familiarizing you with what Cloud Connector Edition is, how your Office 365-based Skype for Business users can benefit from it, and whether or not this is something your organization needs to explore a bit more deeply. For the consultant crowd, this is certainly a deployment option to gain knowledge on to be ready to pitch it to the customer that is the right fit!

Stay techy, my friends!

Saturday, March 26, 2016

Issue With Provisioning Skype for Business Online DNS Records in Office 365 for Recycled Domain

Happy Weekend, UC Geeks!

So, I was inspired to write a little blog post based on some odd behavior that I ran into the other day in Office 365 when trying to allow the Domain Management wizard to auto-create my required DNS records for Skype for Business Online. Yeah, sure, I could have just gone into GoDaddy's DNS tool (yes, I use GoDaddy for domain registration and DNS management - let the hazing begin!), but what is the fun in that when Office 365 has a handy little wizard for taking care of those DNS records for you?

The Scenario


Alright, in this particular Office 365 tenant, I have my domain, 's4blab.org', added in and verified. This domain was added in previously for other testing, but in the previous tests, the domain was used in a Hybrid environment, so I also used the domain name in my on-prem Skype for Business deployment as well. As such, my DNS records originally pointed to my on-prem Edge and Reverse Proxy servers. Savvy?

Now, that on-prem environment is long-since gone, but the Office 365 tenant has been left up, and therefore the domain was still verified and ready for use. I still had Skype for Business Online (Plan 2) licenses purchased. That meant that it was now time to make sure everything looked OK with the domain itself (DNS, etc.) within Office 365 so that I could start creating user accounts and assigning licenses.

To verify I was good to go, I first logged into the Office 365 Admin Center Preview (yeah, I am using the Preview interface cause I am awesome like that), hovered over the Settings menu item in the left-hand navigation, and then clicked Domains:


This brought me to my Domains page. Here we can see that I only have the Default 'onmicrosoft.com' domain, and my custom 's4blab.org' domain. Clearly the domain is not ready for production. It has a warning icon beside the domain name, and tells us that there are "Possible Service Issues":


Clicking on the domain itself brings up another modal screen that shows us that there are DNS errors. It then proceeds to highlight all of the required DNS records for the various Office 365 services that can be used in our tenant. Next I click on View Errors:


The next screen shows us what the expected CNAME Records are, compared with the Current values, which are empty. Reading the text at the top of this screen we can already see that Office 365 recognizes GoDaddy as the location of our authoritative DNS zone file for s4blab.org. We can also see that it lets us know that we can use that handy little Fix My Records button up top instead of going to GoDaddy and manually fixing the records. Sure, why not?!


Once we click the Fix My Records button, another pop-up window appears asking us to input our credentials. In my case, this is my GoDaddy credentials.


Upon successfully authenticating at the above screen, you are now presented with another screen in which you must click Accept, authorizing Office 365 to make DNS changes to your domain in the DNS zone file hosted at GoDaddy. Of course, we click Accept here:


Once we click Accept, this GoDaddy pop-up disappears, and we now see a grey box across the screen showing us that our DNS records are being configured:


The Problem


So, what's the problem? Normally, if this domain had not ever been used for another Skype for Business (or Lync) deployment before, your records would simply be created, and you would be on about your business! Remember though, I had used this domain for an on-prem Skype for Business Server 2015 deployment previously. So, at this stage in the game, that Configuring your DNS records... box just kept spinning, never completing. After about a few minutes I figured something was wrong.

My next step was to log into my GoDaddy portal and navigate to the 's4blab.org' DNS zone file. The Office 365 Domain Management wizard claimed that the CNAME records flat-out did not exist. Looking at my CNAME record section, I can see that this was indeed the case: no 'SIP' or 'Lyncdiscover' records were present:


Alright, so why won't the wizard just create the records and finish. Aha! My eyes glance up at the A Records above, and that's when I see the problem: The 'SIP' and 'Lyncdiscover' records did exist...as A Records!


Yes, I blotted out the IP addresses of the other A Records to protect the identities of the Innocent. And I put in fake IPs (non-routable on the internet) for these records. After all, I am just reproducing the problem for demonstration purposes!

In case DNS is not your bread and butter and you are wondering why this is a problem since the CNAMEs did not exist, and Office 365 was trying to create the CNAMEs instead of A Records, you cannot have similarly named records in the same DNS zone, regardless of record type. Therefore, I cannot have a 'SIP' A Record, and a 'SIP' CNAME. A conflict is detected on GoDaddy's end, and that is why the wizard never finishes in Office 365. It knows there is a problem, but has not been coded to properly display the problem to the Office 365 admin user.

The Solution


Now I know what needs to be done. First, as I am no longer using those A Records any longer, I delete both the 'SIP' and 'Lyncdiscover' A Records from my GoDaddy DNS zone file. Don't forget to click on Save Changes!


Perfect, now the A Records section does not reflect the records anymore:


However, going back into Office 365, I see that the grey bar is still present, and it still shows that it is trying to Configure the DNS records. Finally, I decide to try it from scratch. I click on the Fix My Records button again, and I am once again prompted to input my GoDaddy credentials:


After another successful authentication, click on Accept again, and like before, the GoDaddy window disappears. This time, however, we have much different results! We VERY briefly see the grey 'Configuring' bar, but then it disappears and we see a beautiful green bar showing us that the records have been created successfully! We can even see that the yellow warning icon has disappeared from beside our domain name:


Going over to our GoDaddy portal, we can see that the new CNAME Records are indeed created:


And there you have it, folks! The Domain Management wizard within Office 365 is quite the wonderful tool, making DNS management a walk in the park for admins across the world! However, if you have used your domain in a previous Skype for Business deployment and did not properly clean up your DNS zone file afterwards, the Office 365 wizard will not ever finish, but also won't tell you what the problem is. Now, thanks to my bumbling lab work, you know why!

Stay Techy, my friends!

Monday, November 16, 2015

Skype for Business Online Voice Refresher and E5 Licensing Explained

"I'm getting that Cloud Voice Whatchamacallit!"

I have had several conversations lately where it has become clear that there is definitely excitement around the emergence of calling (PSTN) capabilities in Office 365, but that there is also a bit of confusion about the various terms that are related to this functionality. This confusion can become compounded with the different hybrid options that are also available, and still in Preview (and thus, still subject to some change). The distinctions are becoming more important to make, however, as the time is right around the corner to start paying for these services!

With the arrival of the Office 365 E5 sku on Dec. 1, I figured now was as good a time as any to throw a few of the terms out there, and chat about what is what. For starters, lets talk about the "Cloud PBX with PSTN Calling" preview.

Cloud PBX

Alright, so when the preview came out, it was called "Cloud PBX with PSTN Calling", and it was a single preview. This made it feel like the new functionality that you were previewing was a single feature or billable product. However, that is not quite the case. That "with" is really a bridge that allowed you to preview two separately billable items. "Cloud PBX" refers to the call control features and abilities that are present for a user that is licensed for Cloud PBX in Office 365. Essentially, a properly licensed user for Cloud PBX has similar features available that they would have over their phone via an on-premise PBX. This sets them up for being able to make/manage calls and have voice connectivity to the PSTN, BUT, it does not actually provide them with that connectivity, a phone number, or dial plan with minutes. Much the same way that you can enable a user for Enterprise Voice in Skype for Business Server 2015, which brings with it additional licensing costs, that user still cannot call a phone number unless you have also paid a provider for service and phone numbers.

So, why would you even have Cloud PBX if it doesn't allow you to make calls to/from the PSTN? Well, you would not have Cloud PBX by itself, plain and simple, unless you enjoy flushing money down the drain. This will always be paired with a voice plan of some sort, whether it be directly through Microsoft's cloud, or through your existing voice provider on-prem. The E5 base plan will include Cloud PBX, but unless you bring your own voice services to the table, the PSTN Calling is an additional cost to the base E5 plan.

PSTN Calling

Alright, so now that we have sort of established "Cloud PBX" as a needed base license for PSTN capabilities in Skype for Business Online, what do we need to actually get a phone number assigned to a user, and to allow that user to place and  receive phone calls on the PSTN? That would be the piece that we refer to as "PSTN Calling"! While this will not be included in the base E5 plan, you can add this service on for about an extra $12/month/user, and this will  provide you with the needed phone number and a dial plan to start making calls, all packaged within Microsoft's cloud. According to this article, that total package will  run you about $47/month/user, and will give you about 3,000 minutes of talk time (U.S. talk time; International is extra). Not too shabby!

Cloud PBX with On-Prem PSTN Calling

So that is a bit more of a mouth-full. As the very descriptive name implies, however, this gives you the above PSTN Calling functionality for your Cloud PBX licensed users by connecting your existing on-prem Skype for Business Enterprise Voice environment to your Skype for Business Online environment. Yes, we are talking about Hybrid here, with Directory Synchronization and the whole nine yards! Not only does this approach allow you to extend your existing Enterprise Voice functionality to your Office 365 users, but it also provides you with a gradual approach for slowly migrating an increasing base of users to Skype for Business Online. A lot of flexibility is introduced with this! However, before suddenly migrating all your users to the Cloud while maintaining your on-prem Enterprise Voice environment, keep in mind that not all features will be able to port over with your Online users. For example, Response Groups will only work on-prem. Check out this article for a complete list of which features will or won't work for Online voice users: https://technet.microsoft.com/EN-US/library/mt455212.aspx.

PSTN Conferencing

Alright, I feel like this one is pretty self-explanatory, but for the sake of being thorough, I'll glaze over it as well. Unlike the PSTN Calling add-on for the E5 plan, PSTN Conferencing is included in the E5 license, and does NOT come with a cap on minutes. This of course provides users with access to a conferencing phone number so that they can schedule Skype for Business meetings, and allow outside or anonymous users to join these meetings via PSTN dialin. Again, this would be packaged through services available in Microsoft's cloud, so you don't have to do the leg work of finding a provider and signing another contract.

In Conclusion...

So, for those of you that were starting to confuse any of these terms, blending any of them together, looking for a better high-level understanding of how all these new features relate to the upcoming E5 release, or just wanted to find out some preliminary E5 pricing details, I hope this helped prepare a bit better for what's coming. It's a bright and crazy new world out there, folks, and piece by piece, it's moving to the cloud!

Stay techy, my friends!

Monday, August 17, 2015

Exploring Azure AD Connect - Part 3: Configuring User and Password Writeback with Azure AD Premium

Other posts in this series:


Exploring Azure AD Connect - Part 3: Azure AD Premium Features


Well, this series has taken a while to wrap up! What can I say? When it rains, it pours. So far, we have taken a look at setting up Azure AD Connect for synchronization in a Hybrid environment using Express Installation, and we followed that up with a look at setting up synchronization and SSO with AD FS, which of course was a bit more complicated. Now we move on to a couple of the advanced synchronization features that require Azure AD Premium licensing.

First, let's list out a few of the awesome features that can be achieved through Azure AD Premium licensing and Azure AD Connect:

  • Multi-factor Authentication
  • Self-Service Password Reset for users with Write-back to On-Prem AD
  • Password Write-back
  • User Write-back (Note: This feature was in Preview, but is not available as an option currently. I have been instructed by an Azure AD Product Manager to stay tuned for GA.)
  • Group Write-back is also possible, but does not require Azure AD Premium licensing. Groups are written back as Exchange Distribution Lists, and have other Exchange requirements
  • Device Write-back

As you can see, there are some very cool perks with using Azure AD Premium licensing. Check out this link for a more in-depth comparison of the feature sets between Azure AD licenses, and price comparison: http://azure.microsoft.com/en-us/pricing/details/active-directory/.

Getting Started - Azure AD Premium Trial

Obviously, you can go out and just purchase Premium licensing if you want to, but for the purposes of this tutorial, I was just testing and demonstrating, so I took advantage of the 30 day trial that was available.

To do this, you can log into your Admin Portal for Office 365, and then towards the bottom of the left-hand navigation menu, under the Admin menu item, click on Azure AD. This will open up the Azure AD portal. From here, you will click on the ACTIVE DIRECTORY tab on the left side of the screen, and then click on your AD instance name. In my case, this was "The MS UC Guy". You will now see the below screen, and as you can see, our Trial awaits with the TRY AZURE ACTIVE DIRECTORY PREMIUM NOW link button at the top of the screen. Click on it.


You will then be prompted to agree to the terms of the Azure AD Premium trial in the Activate Azure AD Premium trial box. Click the check mark button at the bottom-right of the box.


After accepting the terms, you are brought back to the main Active Directory screen, and you can see that your Premium trial is being activated.


Once your Premium licensing has been activated, it is time to go to your server that has been setup to run Azure AD Connect. Let's take a quick moment to look at what our On-Prem environment looks like.

On-Prem Lab Environment


My "On-Prem" environment is the same virtual environment in Rackspace's Public Cloud that I used in the previous posts in this series, minus a couple servers. All servers in this environment are running Windows Server 2012 R2, and are fully patched. All are joined to the S4BLAB.org Active Directory domain. The environment consists of:
  • 1 Active Directory Domain Controller
  • 1 small server for installing Azure AD Connect
  • 1 small client VM, joined to the on-prem Active Directory domain

Office 365 Environment


I am using the same Office 365 tenant that I used in my previous posts, using only Skype for Business Online Plan 2 licensing, and now the Azure AD Premium licensing. I cleaned up the environment by uninstalling Azure AD Connect completely from the on-prem server, deactivating synchronization in the Office 365 portal (this can take up to 72 hours to take effect), and then deleting all users that had synced from the on-prem Active Directory from the last post.

NOTE: You must also delete the users in the Deleted Users section of your Office 365 portal as well, because if you have any same-named users from a previous lab/demo, you can run into issues where password writeback won't work due to duplicate entries. You cannot purge the Deleted Users from the Office 365 Admin portal; instead, reference this article for how to connect remotely via Azure AD Powershell module, and purging those users: http://jaapwesselius.com/2014/12/10/purge-deleted-users-in-office-365/.

Per the last post, the custom domain "s4blab.org" is already setup in the portal, with all necessary DNS records having been created. Lastly, before getting stared, I navigated to the Active Directory synchronization line at the top of the Active Users page in the Office 365 admin portal, and clicked the Manage link button. From there, I activated AD synchronization by click the Activate button, as seen below:


Configuring Azure AD Connect for User & Password Write-back

Alright, now it is time to get into how to configure Azure AD Connect on our on-prem server. The advanced features that we will be demonstrating are User Write-Back, and Password-Write-Back, because how cool is it that we can manage our users in the Cloud, and have the changes synced back to our on-prem AD?! Let's dig in:

  • Once you have downloaded the Azure AD Connect tool from Microsoft's Download Center, run the AzureADConnect.msi file. You will see the below Welcome screen. Check the box next to "I agree to the license terms and privacy notice.", and then click the big green Continue button. 
  • On the Express Settings screen, click the Customize button at the bottom.
  • On the Install required components screen, leave all the boxes un-checked (unless any of those specific Optional configurations apply to you for some reason), and click Install. You will then see the progress bar as the required components are installed. 
  • The User sign-in screen comes up and gives you three options. This time, we will leave the default option selected, Password Synchronization, and then click Next. 
  • The next screen is the Connect to Azure AD screen. Input credentials from your Office 365 subscription that have the Global Administrator role assigned (preference here is to use an @domain.onmicrosoft.com account, and NOT a user with the same domain name that you are about to sync with), and click Next. You will see your Microsoft Online credentials be validated, and information from your Office 365 environment verified. 
  • Next, you will add your on-prem AD domain on the Connect your directories screen. You should already see the Forest field populated. Add your credentials, and then click the Add Directory button. The credentials get verified, and then you can see the directory added. Click Next
  • Leave the defaults selected on the Uniquely identifying your users screen, and click Next
  • On the Filter users and devices screen, you can either enter a Distinguished Name or name of a group in AD, and then click Resolve, or you can Synchronize all users and devices. We are leaving the defaults since this is just a demo environment, and clicking Next
  • The Optional Features screen is where we make our important selections for this post. As you can see, the Password sync box is selected and grayed out because of our earlier selections in the wizard. We will now check both the Password writeback and User writeback boxes (Note, as of the time of this post, User Writeback still shows as being in Preview). Click Next
  • Next we come to the Writeback screen, where we need to traverse the on-prem AD tree structure to select the target Organizational Unit (OU) for User Writeback. Here we have created a special OU for this: The Users OU underneath the Awesome OU, of course! Once you select the desired OU, click Next

  • Finally, we have the Ready to configure screen. This gives us a chance to review our previous selections. We are going to leave the Start the synchronization process as soon as the configuration completes box checked, and click Install. 
  • After clicking Install, we see the wizard make several configuration changes before finally showing us the below Configuration complete screen. Click Exit. 


Now, if I had been thinking, I would have had users created in the first place, so that we could see that the initial synchronization replicated those users to Office 365. However, I didn't do that, so I went ahead and created Josh, Jack, and Jill in our Awesome -> Users OU: 


Now, back on our Azure AD Connect server, I click on the Start menu, and find the Azure AD Connect Synchronization Service, and click on it:


Now we see the below tool:

We are going to click on the Actions menu, and then select Run from the drop-down menu:

A pop-up box opens up, and we need to select Full Synchronization. Then click OK.

After this synchronization runs, we should be able to see it's successful status in the Service tool that is open. Go ahead and close this tool now, and let's go back to the Active Users screen in our Office 365 Admin portal. Voila! Look at those users!


User Writeback

(Note: This feature was in Preview, but is not available as an option currently. I have been instructed by an Azure AD Product Manager to stay tuned for GA.)

Ok, so, now that our users have synced from our on-prem AD to Azure AD, let's flip that switch. We create a new user called "Cloud Man", and as you can see below, his Status shows as "In Cloud".


NOTE: when going through the user creation wizard in Office 365, I selected the Azure AD Premium license. Without this, the user would not be able to sync back to the on-prem AD. Alright, time to go check out our on-prem AD and see if this user replicated. If you do not see them in AD yet, you may have to wait for a while before the next synchronization pass. However, after waiting a while, I was able to see Cloud Man in the proper OU (as defined in the wizard earlier. User Writeback is a success! 


Password Writeback

Alright, back in our Office 365 Admin portal, we now need to go to one of the users that we synced from our local Active Directory, check the box to the left of their name, and then click the Edit button under the Assigned license section on the right.


In the Assign license overlay, select the user's country from the drop-down list, check the box beside the desired license (in this case we want Azure Active Directory Premium for Password Writeback functionality), and then click Save


Now, with Jack's user object still selected, click on the Reset Password link button in the user actions on the right side of the screen. 


The resulting overlay allows us to specify an email address that the password will be sent to, and we can also choose to require the user to reset their password at next logon. We have left  this unchecked for this demo. Click Reset.

Once the reset finishes, you should see this reported back as a success, and you will be given the password. Make note of this password, so that we can try logging in with Jack on our test client VM. Click Close

Now, to prepare our client VM, we needed to allow Jack to logon to the server by adding him to the Remote Desktop Users group on the server, but this is not  necessary if you are logging onto a client OS in your AD environment, rather than a VM with a server OS.

Lo and behold, once I logged in with a new password, I was actually prompted to change my password (the one issued from Azure AD was a temporary password since it was done by the administrator, and not by the user themselves via Self-Service Password Reset). Amazing!

In Summary....

In summary, Azure AD Premium licensing is freakin' awesome! The new feature set that opens up to Office 365 hybrid users is incredible, and I have just scratched the surface (barely!). Don't take my word for it, though. Dig in, and open up a new world of hybrid goodness to your organization!

Stay techy, my friends!